I continued working through the Pracitval Vim book today.
I learned about the cmd line window which is different from the command-line mode.
Accidentally I have ended up there numerous time by accidentally typing q: rather than :q to exit a file.
Previously, it had nover occurred to me to examine what was was going on and instead I would repeat :q twice to exit the mysterious window I was trapped in and then to exit the file as intended.
Now, I realize that this window allows you to see the history of command you have typed into the command mode as a buffer.
You may navigate the history as you like and even manipulate it to run new commands.
For example, you could find a command you had split into two like lint file and test file.
If you hover over lint file in cmd line window, and go to the end with A and insert a pipe char |, you can then enter J to move the line below to the current line which should result in lint file | test file.
Then
I also learned you may enter a enw shell session by typing :shell in the command mode but more interesting is that you can background Vim or any shell process with Ctrl+Z.
Then you may list jobs with jobs.
If you wish to reattach a job, just foreground it with fg.
Definetly going to use this in the future.
Other random notes:
:ls list the open vim buffers while :!ls does what any UNIX user would expect.
write !sh is a neat quick way to run each command in the current buffer in shell environment.
read instead puts command output into the buffer.
% refers to the current filename of the buffer.
! is reffered to as “bang” for executing shell commands.
On the Godot front:

I completed adding a boost effect to the moving ship by hitting spacebar.
That was pretty simple as it only required increasing the speed to multiply the direction velocity vector by.
More interesting was the method for smoothing movement.
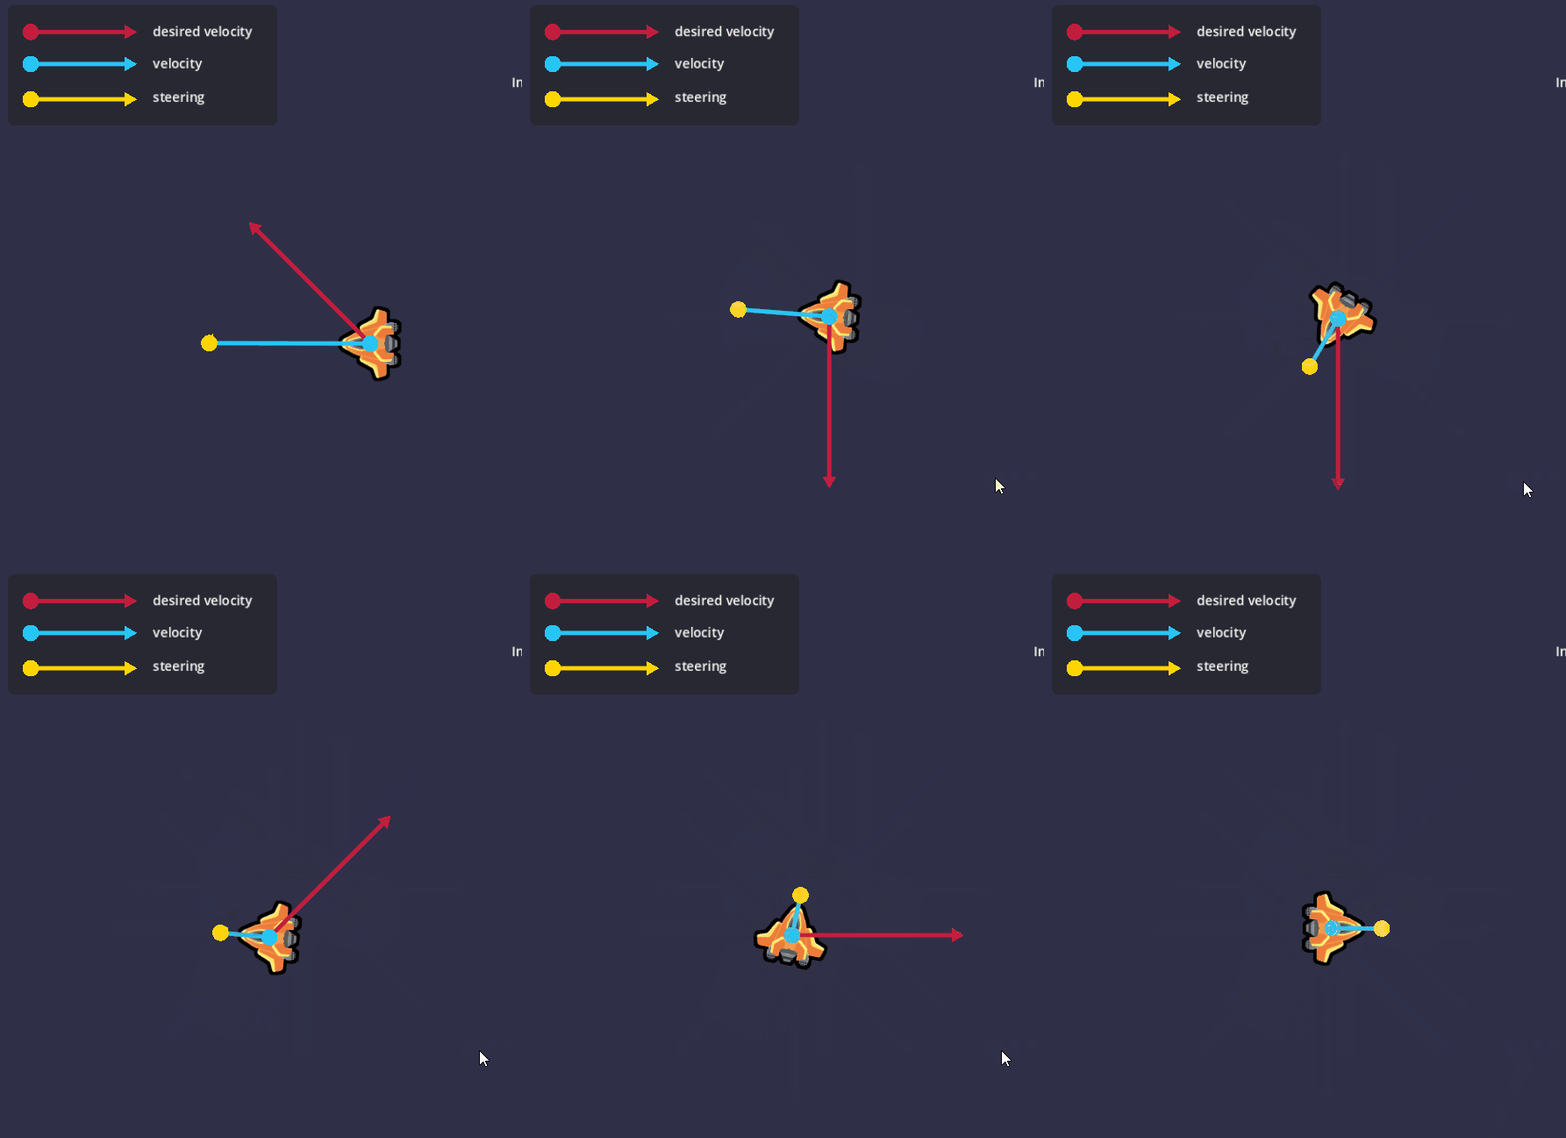
As shown in the gif above, the method to determine the desired velocity vector was to multiply the speed scalar by the direction vector based on the current movement inputs (including boost).
Subtracting the current velocity from the desired velocity vector gives us the steering vector or the vector that points in the direction the ship should turn to correct course smoothly from its current state.
Then we introduce another scalar that we can call steering_amplifier between 0 to 1 (but really above that because we multiply by the delta which is below 1) that is used to determine the lagginess feel of the controls.
A high value would make the controls not lag at all but also look jittery.
A low value would feel laggy for movevent of the ship to even stop moving after releasing the controls, however can’t argue it not smoother than the higher steering values.